Automation Tutorial for Assembly Line/Advanced Assembly Line Using Advanced Hypercube
此页面有 中文 版本
当前正在浏览 English,可一键切换到你的偏好语言 中文。
Author: @propylaia
Please supplement if there are omissions or errors.
Applicable to Normal Mode.
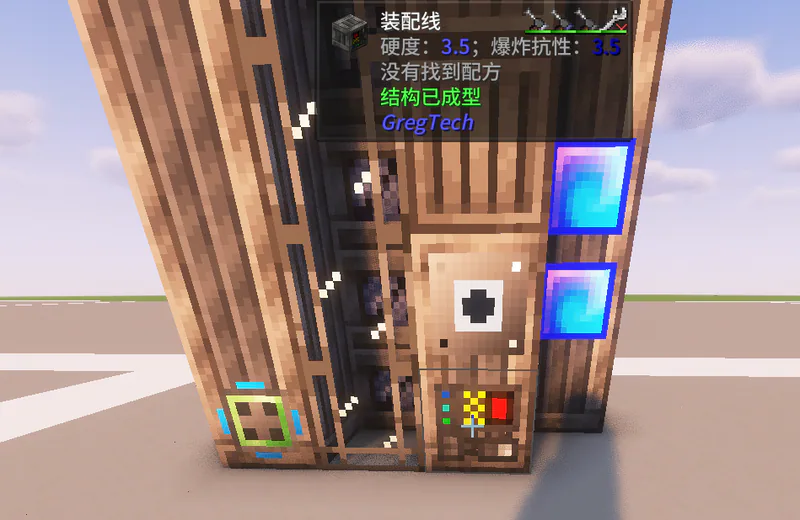
1. Preface
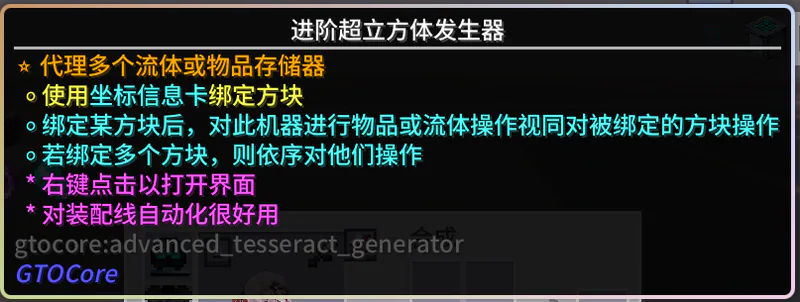
The Advanced Hypercube can use a Coordinate Information Card to bind 20 blocks, and defaults to sequential mode, perfectly matching the orderly requirements of assembly lines.
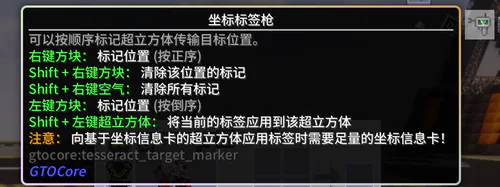
Version 0.5.4 added the "Coordinate Tag Gun", which greatly enhanced the functionality and made binding blocks even more convenient.
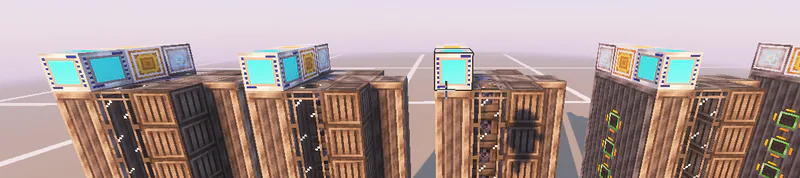
2. Recommended Setup Aspects for Assembly Lines
After placing the main block, I personally recommend right-clicking the "main block" with a wrench to rotate and place the assembly line.
Set the repeat structure count of the terminal to 17, which is the maximum size. This layout facilitates batch construction and does not take up too much space.
Hypercubes and Suppliers/Interfaces can be placed on the top.
Note: Normal mode can use a quadruple input hopper, while Expert mode requires four input hoppers.
3. Use the "Coordinate Label Gun" to mark the input bus and input hopper
Use guns from low to high "Right Click" mark the input bus of the assembly line and the four-input bins
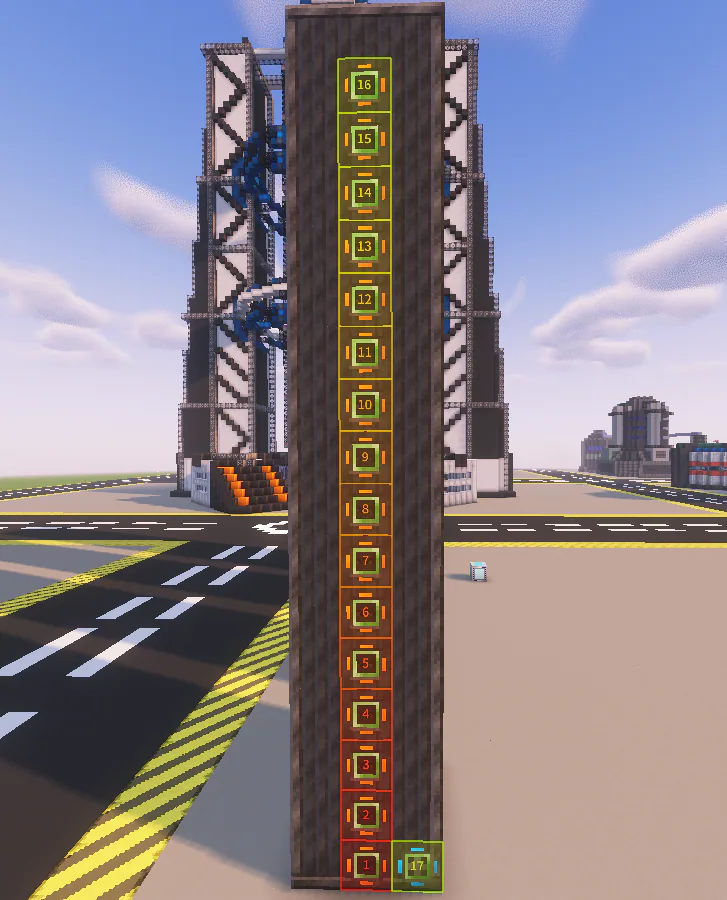
Once all 17 storage compartments have been marked, the coordinate tag gun Shift+Left Click"Hypercube" can be imported into the Hypercube.
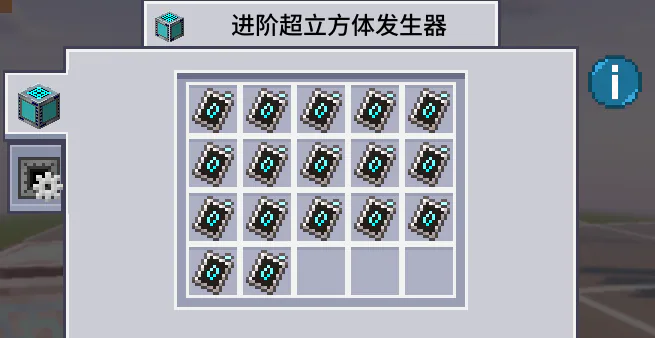
Note: The backpack needs to carry 17 coordinate information cards. When there is an AE wireless terminal inside the backpack, it will automatically use the coordinate information cards in the network.
4. Regular Assembly Line Supplier Configuration
Traditional methods
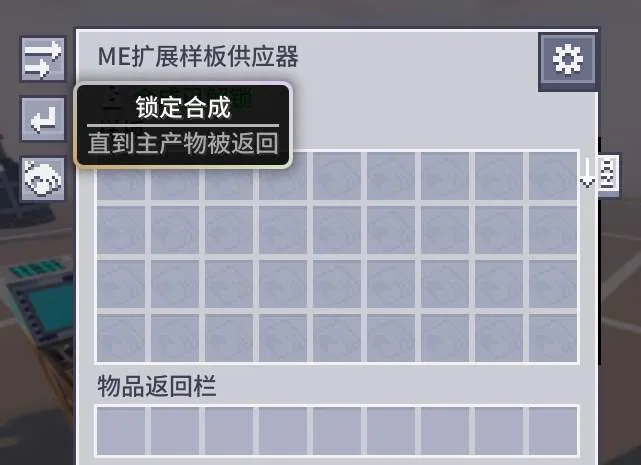
Place the Template Supplier above the output assembly, then enable the "Lock Synthesis" function of the Template Supplier to complete the build.
When scaling up for mass production, use the same setup for every assembly line, then replicate the same blueprint using memory cards to achieve parallel production.
Use the hypercube 'Polling' mode to wrap the 'Sequential' mode
Place the Hypercube anywhere, and use a screwdriver to switch the Hypercube into Poll Mode. (As the superior)
The hypercubes on the assembly line remain unchanged. (As a subordinate)
The original template supplier has been moved to the "upper" hypercube edge,
Attach the ME interface above the output assembly and return the finished product to the network.
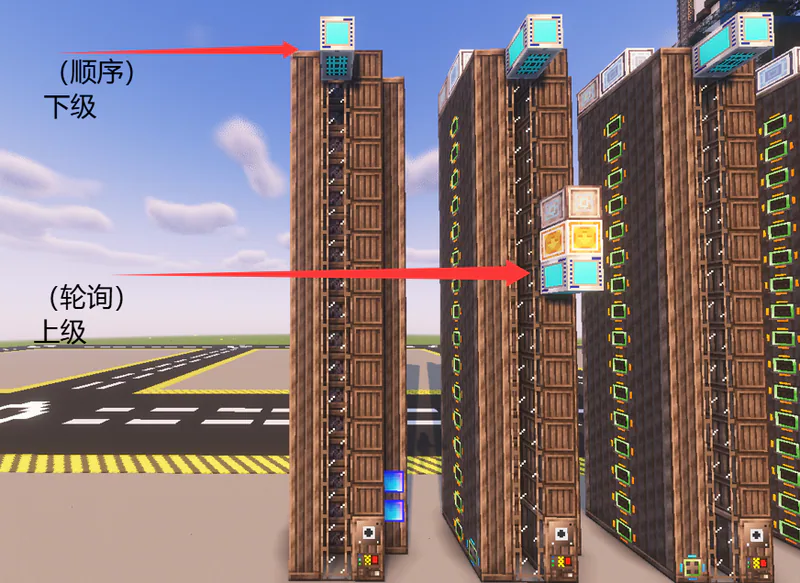
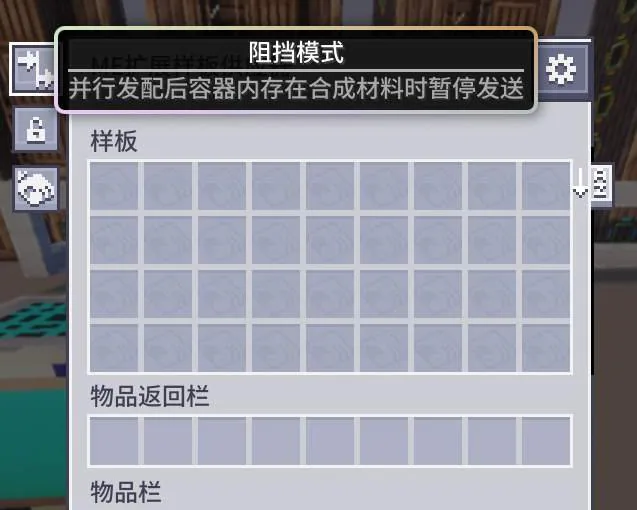
Finally, open "Pause Sending When Synthetic Materials Are Present in the Container After Parallel Dispatch" in the upstream template supply unit to complete the setup.
5. Advanced Assembly Line Feeder Configuration and Additional Notes
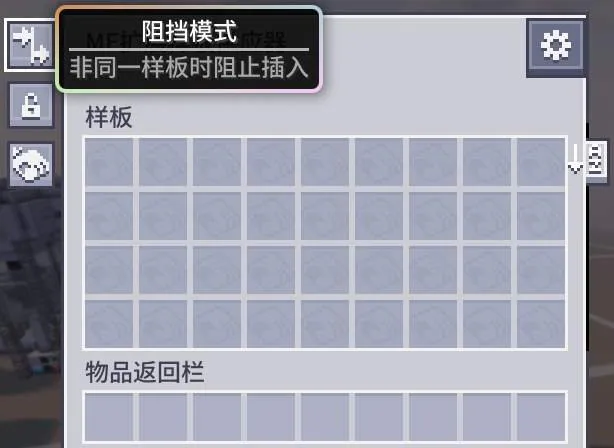
Set the block mode to "Prevent insertion when templates do not match" to run at full parallel speed.
Additionally, when using the "Giant Input Bus", if the ingredients in a recipe exceed 64 items, it will cause the order to be disrupted. The solution is to use a "named template" to adjust the recipe.
For example, the LuV Field Generator
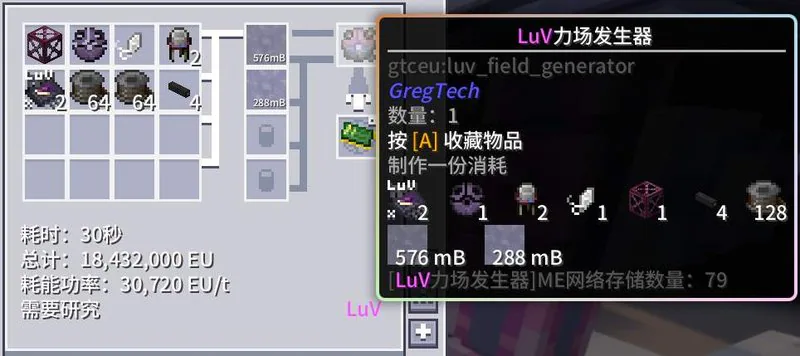
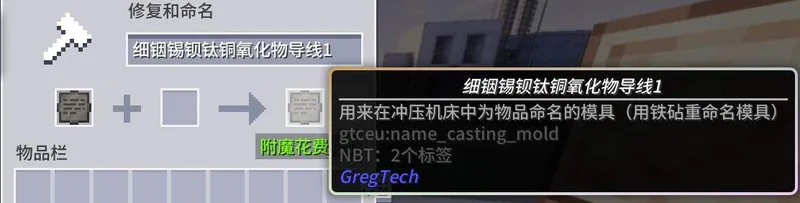
After modification, simply rename the coil and rewrite the sample plate via the stamping press machine.
6. Additional Settings for Expert Mode Advanced Assembly Line
Due to the additional requirement for fluid order in Expert mode, simply using a setup like the one shown in the image below may cause an issue.
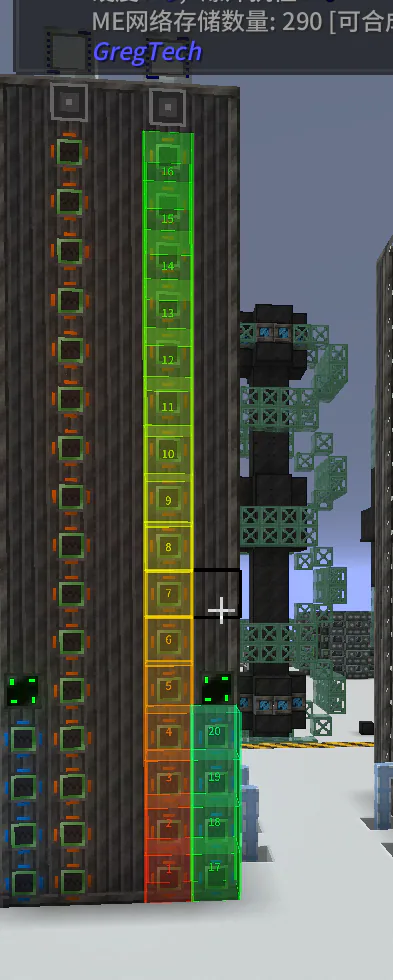
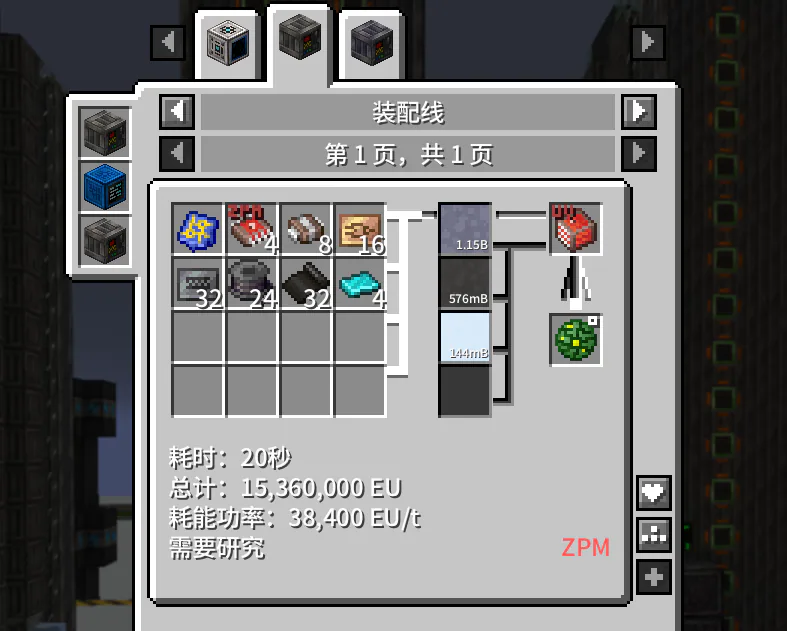
Take the UV stage as an example, where 4 UV input bins are used. To fully utilize the parallel feeding, you usually need to set the template supplier to "Block insertion when templates are not identical". Take manufacturing the Wet Component Processor Supercomputer as another example, producing 10,000 units at a time. The UV input bin has a capacity of 2048B. After the template supplier fills the first input bin with 2048B of solder, since the second and third input bins respectively contain PBI and tin plasma at this point, the template supplier will continue to dispense solder into the fourth input bin, resulting in disordered fluid flow. A simple solution is to change the template supplier's setting to "Pause sending when synthetic materials are present in the container after parallel dispensing", but this means it is difficult to fully utilize parallelism (unless you manually double the recipe) and you have to bear the cost of repeated overclocking and over-loss.
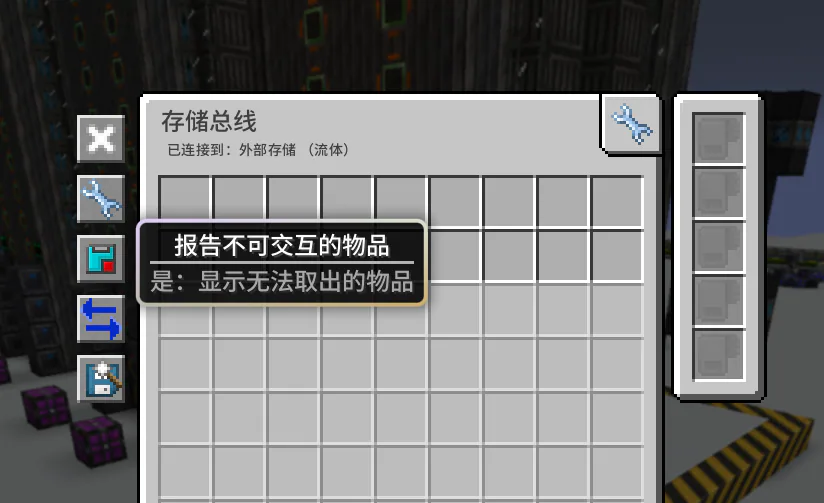
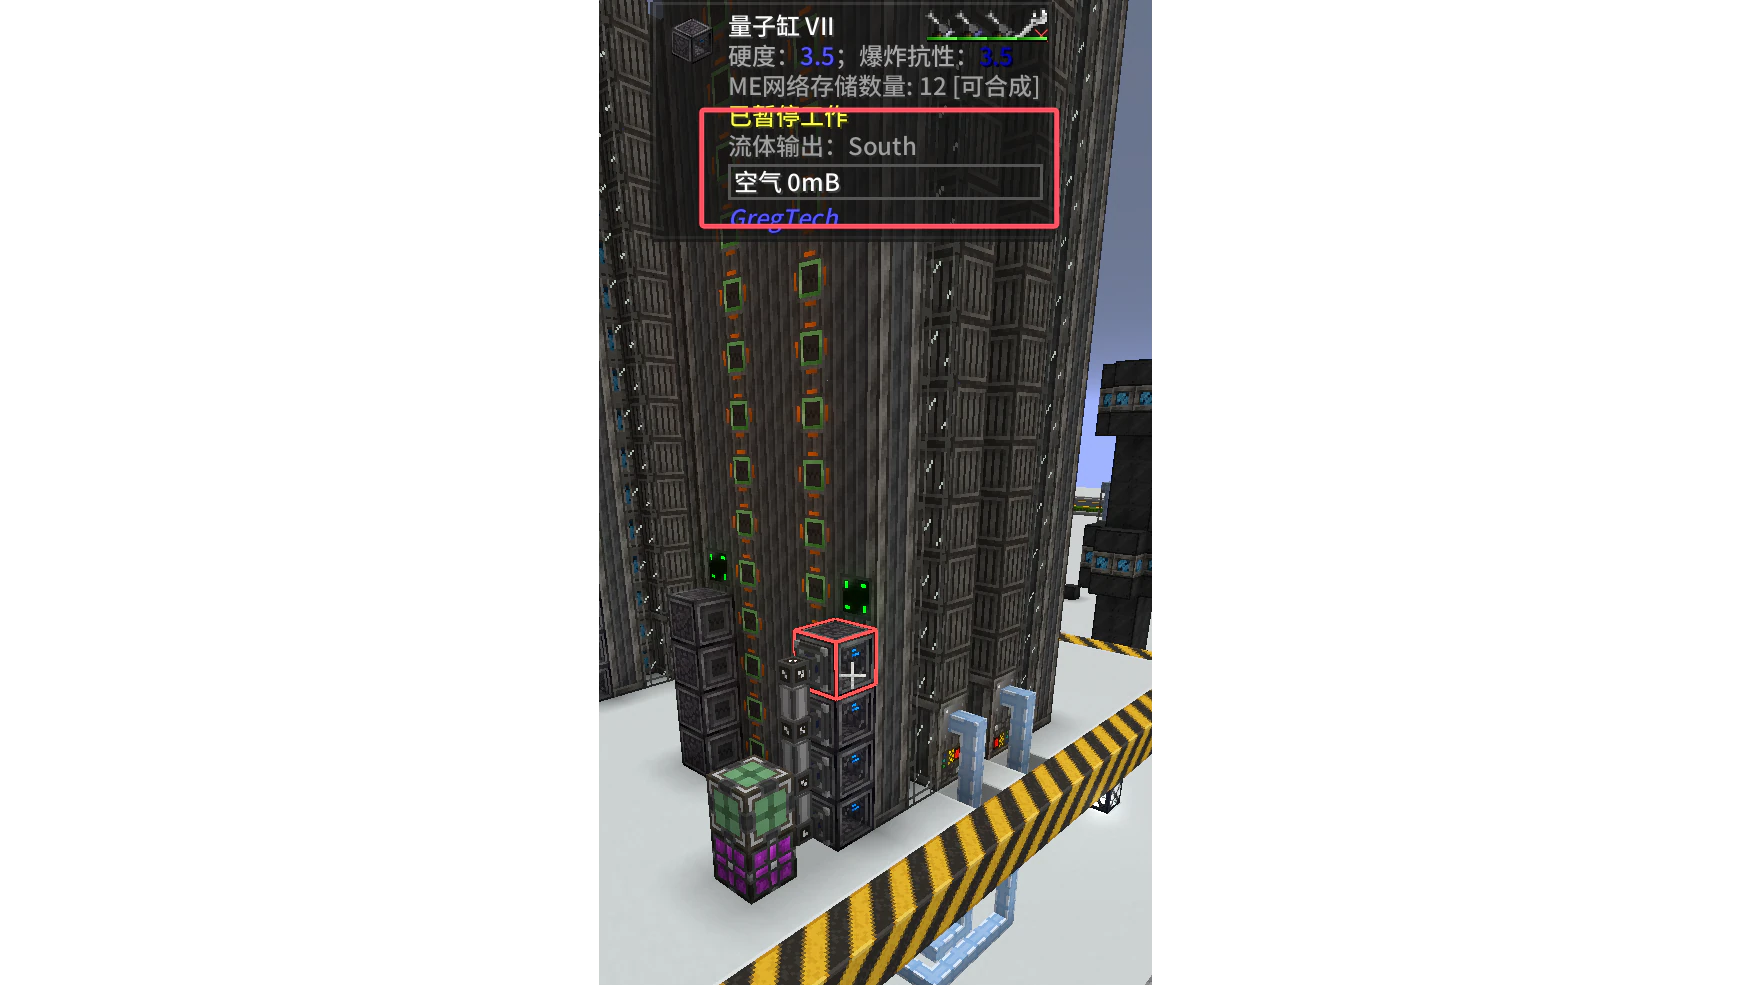
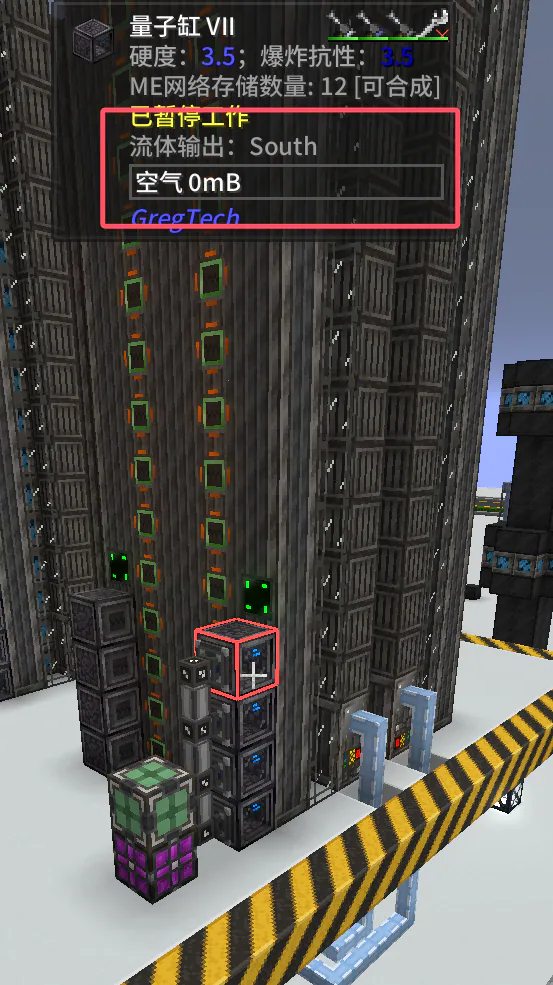
The essence of the above problem is that the cache of the UV input hatch is still not large enough. We can place a super tank in front of the input hatch to cache fluids. However, the interaction between the hypercube and the super tank is not that intelligent. Looking at the Jade display of an empty input hatch and an empty super tank, we can find that when the super tank is empty, Jade displays "Air 0mB", while an empty input hatch displays "0mB". If we change the positions where the hypercube originally binds 4 input hatches to bind these 4 super tanks instead, the template supplier will seemingly think that it can only dispense air into the super tanks, and thus will not dispense materials.
The solution is to change the flow to a subnet, with the hypercube binding the ME interface of this subnet.
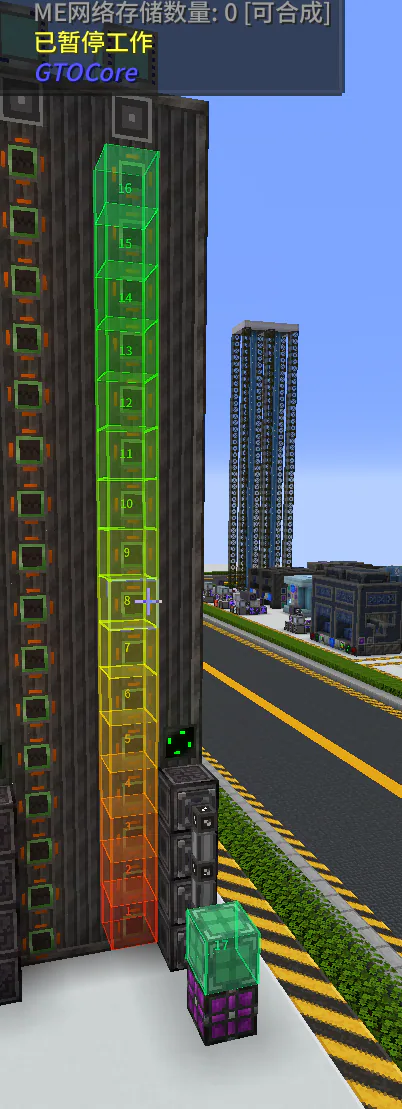
Attach super cylinders to the subnet storage bus. Priority must be set, with values 0, -1, -2, -3 from bottom to top (higher priority goes to lower positions). Enable "Report Non-Interactive Items". The template supply unit should still be configured with "Prevent insertion when templates differ", so you don't have to manually duplicate templates and can fully utilize the parallelism of incoming feeds.